¢ STARTER
The ancient secret to making your bread boogie.
Sourdough starter is a fermented mixture of flour, water, and the magical microorganisms that surround us. Starter basically makes everything we love about bread even better, adding richer flavor, better texture, and a longer shelf life.
The best (easiest) way to procure a starter is to find a friend who’s willing to share the love. Chances are, they got their starter from someone else who got their starter from someone else who got their starter from someone else who...you get it.
But if you’re dying to start your own starter, here’s a step-by-step process for making it.
Here is an Amazon shopping list with products and helpful tools we recommend.
≠ FEEDING AND STORING YOUR STARTER
So, you’ve tapped your local boulanger for a lowkey hand-off of that sweet, sweet starter. You’ll now need to keep it happy and active by feeding it with a little flour and water.
To feed your starter, weigh it and add the equivalent amount of bread flour and a little less of the same amount in water:
Starter: 100g
Bread flour: 100g
Water: 80g
Mix well with a spatula so that everything is combined, then place the lid back on your container loosely, leaving a little airflow.
When not baking, you can either keep your starter 1) chilled in the fridge, or 2) on your countertop at room temperature.
If you keep it on your counter, you must feed it daily. Don’t Stop ‘Til You Get Enough.
Kept in the fridge, the starter is less needy but you must still feed it once a week, even when not baking. After a feed, leave it on your counter for a few hours and let it grow before putting it back in the fridge.
Either method you choose, remember to sing the Bee Gees’ “Staying Alive” to your starter every night in a gentle falsetto.
≠ § ¶ ¢ § ¶ ≠ ¢ § ¢ ≠ § ¢ § ¶ ≠
§ STARTER TIPS
You must feed your starter twice before baking.
STARTER TIP #1
You’re looking for bubbles! A healthy starter is a bubbly starter.
STARTER TIP #2
I typically take my starter out of the fridge the night before I want to bake, feed it that evening, hit the club until sunrise, then feed again early in the morning if I want to start mixing by midday.
STARTER TIP #3
I place a rubber band on my container to measure growth.
STARTER TIP #4
¶ 1. MIXING YOUR DOUGH
Laying down the bass for your boule.
The following recipe yields one loaf of sourdough. If you want to make more than one loaf, we’ve done the hard math for you here, with measurements in grams for flour, starter, water, and salt.
Put a mixing bowl on a scale, tare the scale to 0g, and add the following:
400g bread flour
59g whole wheat flour
32g spelt flour
23g rye flour
347g water
57g starter
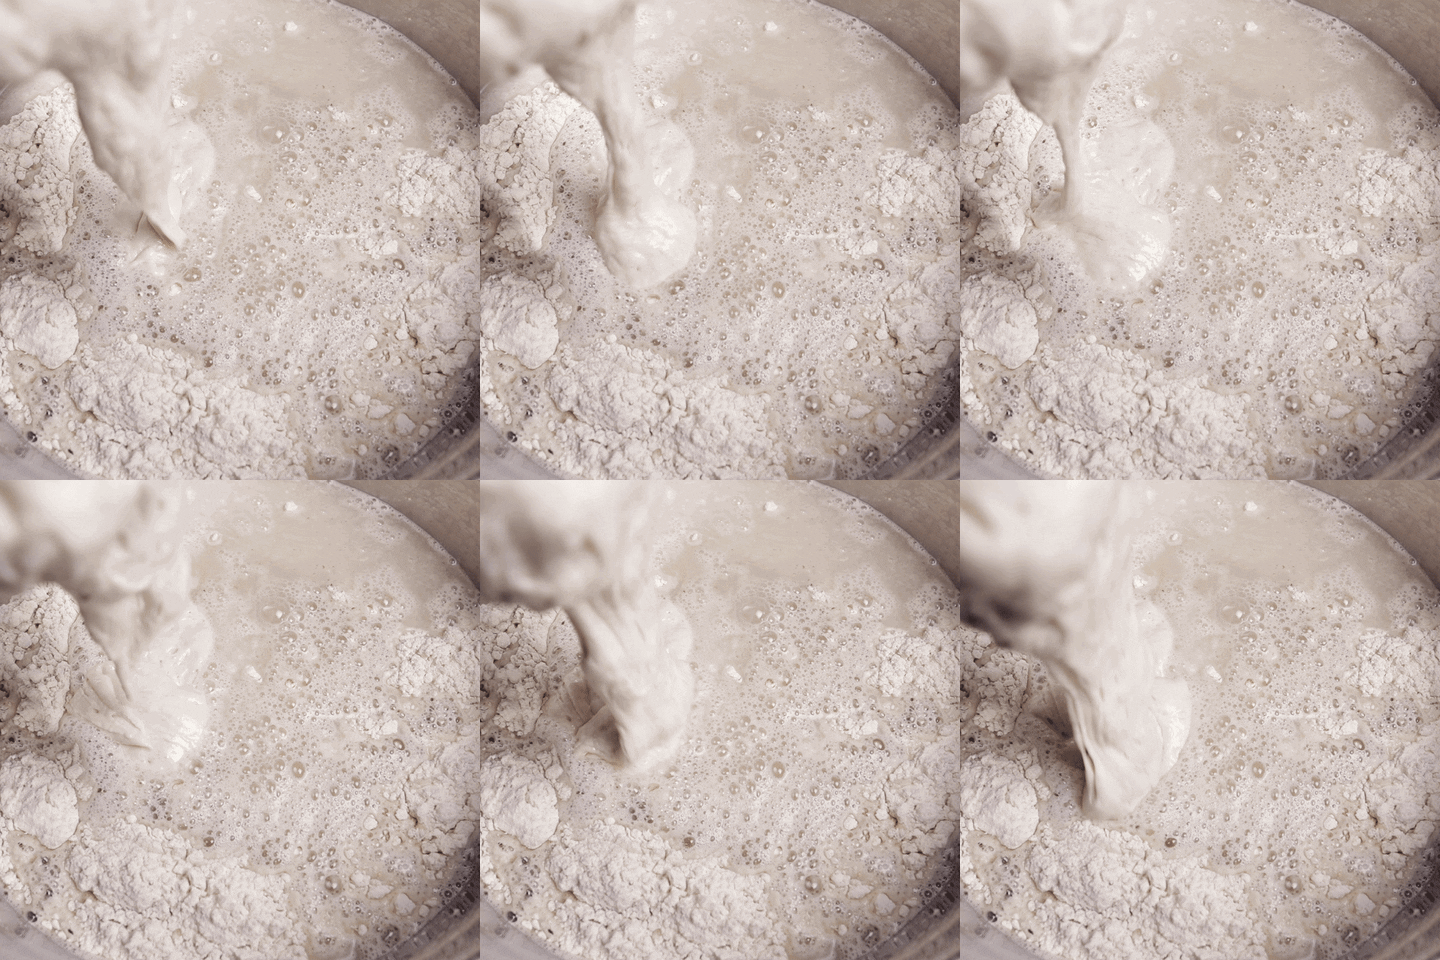
Mix well until there is no flour remaining on the bottom or sides of the bowl. Avoid adding extra water, unless you absolutely need to. It’s not hip to drown out the groove in a goopy mess, you dig?
≠ 2. AUTOLYSE
Cover the bowl with a kitchen towel and give it a disco nap for 30-60 minutes. This is called the autolyse, and it’s when the gluten develops.
After the 30-60 minutes of rest, you’ll notice that the dough has a more elastic texture than when you last touched it.

¢ 3. MIXING IN SALT
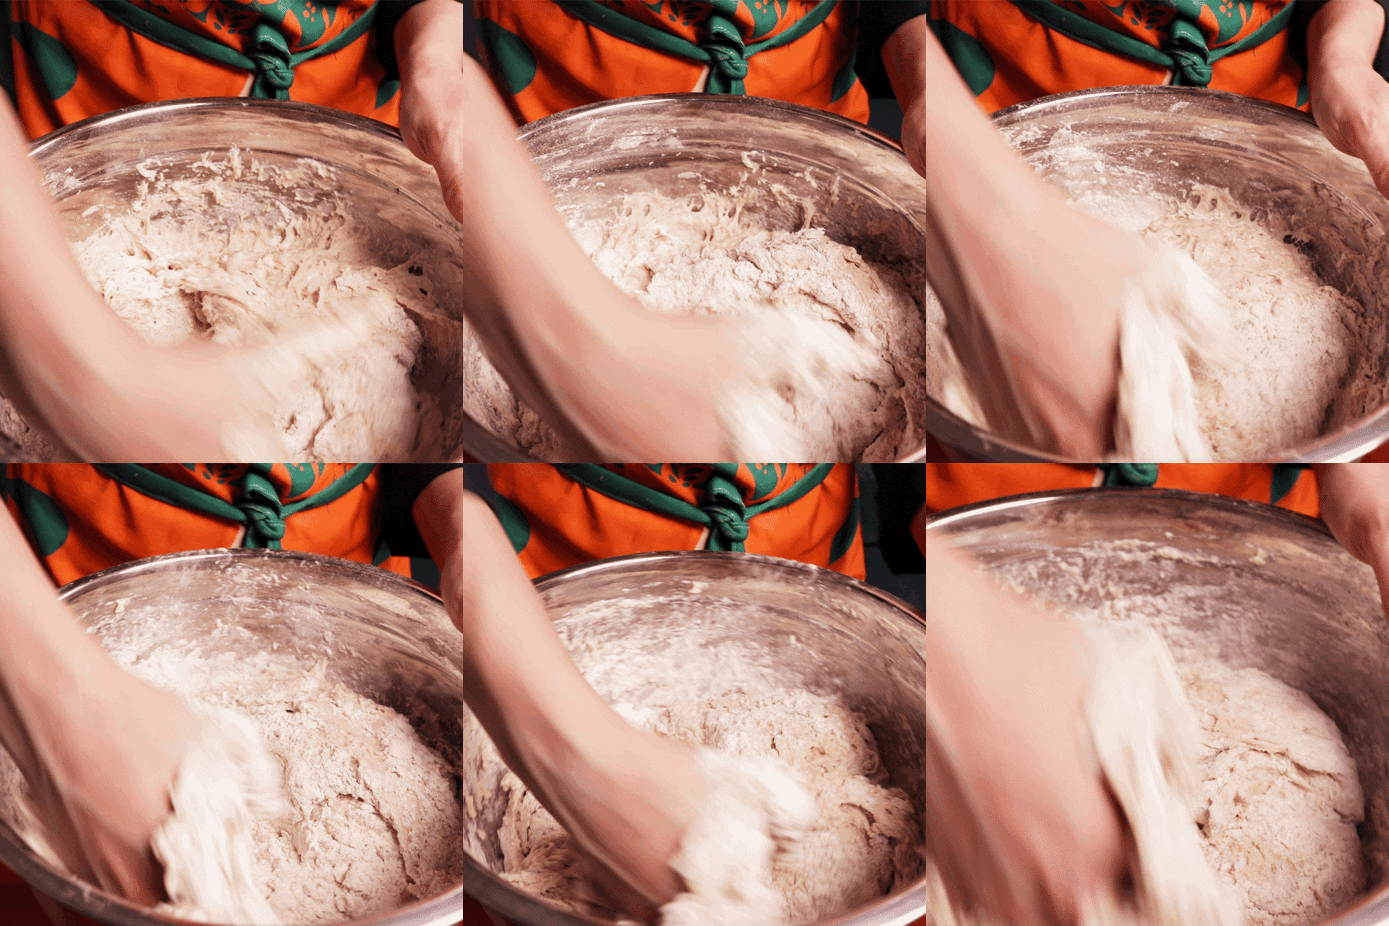
Pour 8g of salt on top of the dough in the bowl and flick or spray a tiny bit of water on top.
Pour the dough onto your countertop and do a combination of kneading and slap and fold (aka my favorite dance move) for 5-7 minutes until your dough feels smooth and the salt feels like it’s melded into the dough.
¶ 4. TOPPINGS
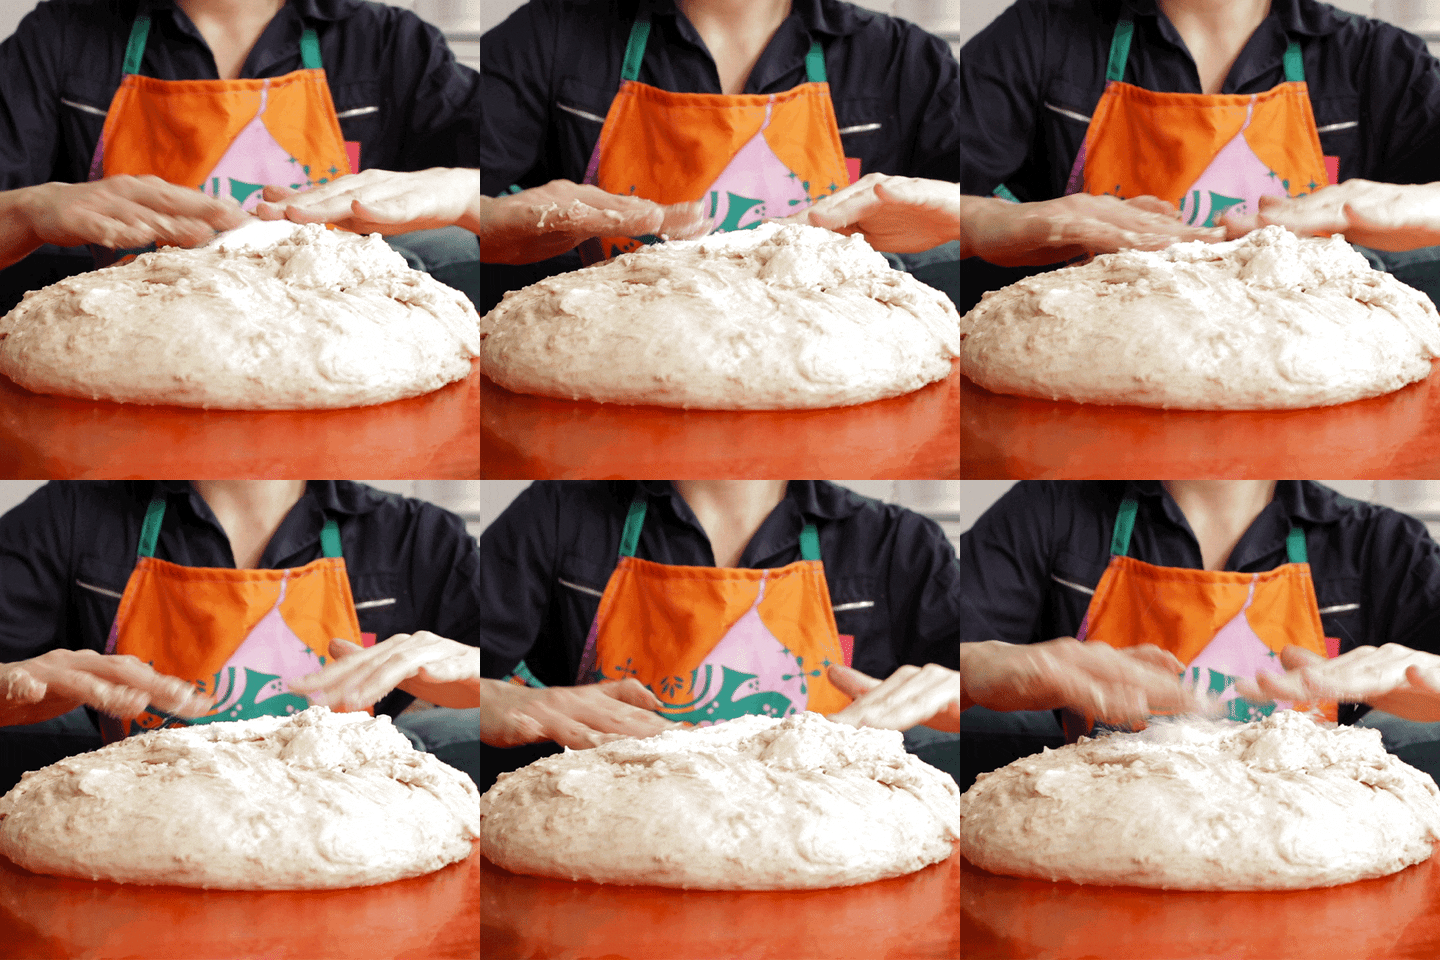
If you’re adding in toppings, lay out your dough and pull it to form a circle or rectangle. Place your toppings on top of the dough, then fold over each edge like a package. Knead in the toppings until they are fully integrated. Skip this step if you’re a purist too hip for the remix.




§ ¶ ≠ ¢ § ¢ ¶ ≠ § ≠ ¶ ¢ § ¢ ≠ §
¢ 1. FIRST PROVE (or, BULK PROVE)
Place your dough into your clean mixing bowl and cover with a plate or lid (not a towel) so no air gets in. Leave it in a warm place for about 4 hours or until your dough has increased by 50% in size.
During those 4 hours, you’ll want to do 2-3 stretch-and-folds within the bowl. This increases the strength of the dough.
To stretch-and-fold, wet your hands with water and grab and loosen your dough from the edges and drop it, then rotate the bowl 90 degrees and do it again until you’ve gone all the way around.
§ 2. SPLIT AND PRE-SHAPE
If you’re making more than one loaf, this is the point when you’ll want to split it into the desired number of loaves using your scraper.
In this case, we just have one loaf.
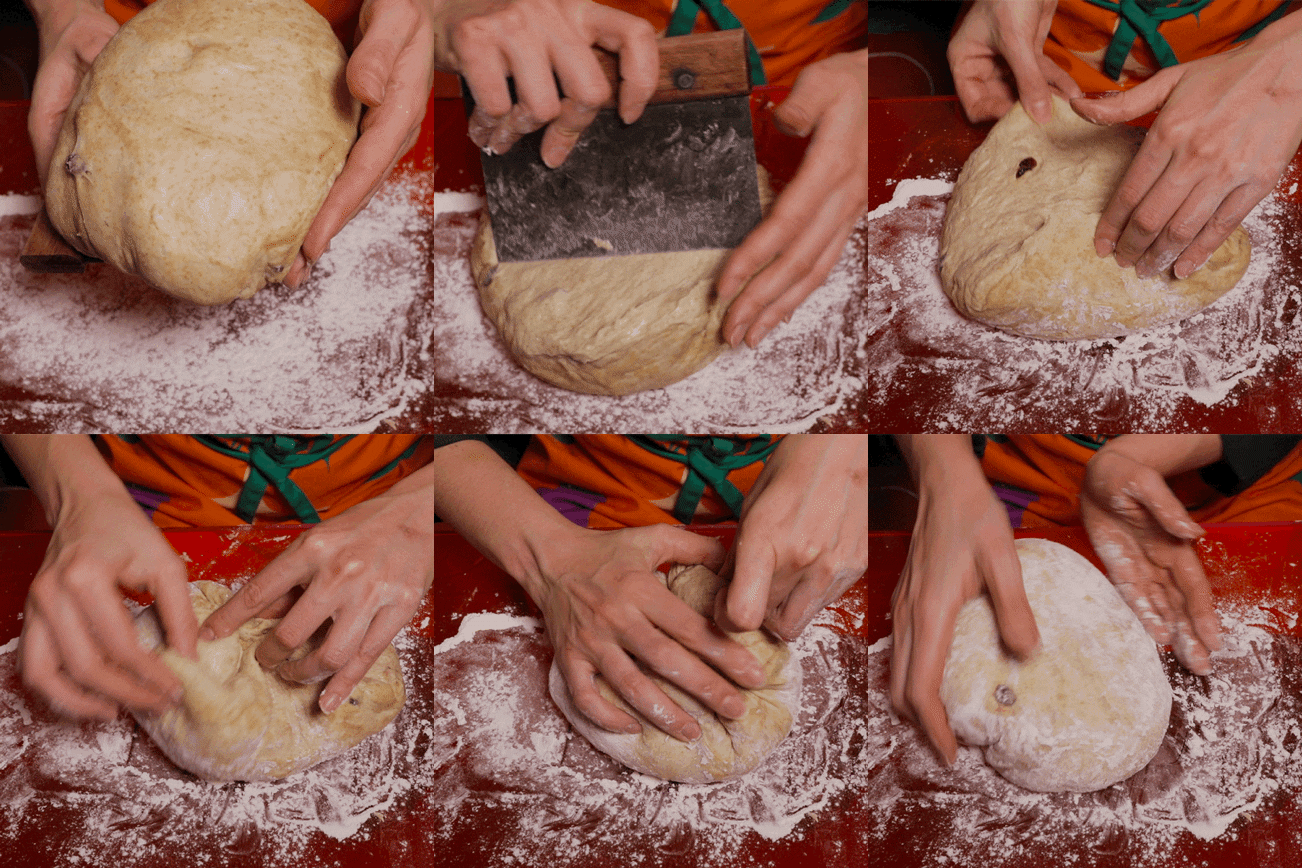
Turn your dough out of your bowl onto an unfloured surface that’s slightly wet with water to prevent the dough from sticking. Use your scraper to pre-shape your dough.
Let the dough rest undisturbed on the countertop for 20 minutes.


≠ 3. SHAPE
Time to Rock Your Baby
Use your flour Shake-Shake-Shaker to lightly flour an area on your countertop. Use the scraper to lift the pre-shaped loaf, and flip it upside down onto a floured surface.
Now it’s time to shape your loaf.
Pull the two sides at the bottom away from each other, making two “wings.”
Fold the right side over to the middle and the left side to the middle over the right.
Using both hands, pull the top of the “envelope” up and away from your body just a bit, then fold it over and down to the middle, sealing against the dough.
Using both hands, grab the bottom and pull up and over to the top.
With both hands, tuck and drag the dough down towards your body to create tension on the outside of the dough. After each drag spin the dough on the work surface and continue dragging until the dough is uniform in shape and the outside of the loaf is smooth with no tears or bulges.
Using your scraper, flip the dough and place it in the proofing basket with the seam facing up.
Before putting your dough in the banneton (a funky kind of basket) you’ll want to use your flour shaker to coat the bottom and sides so that your dough doesn’t stick.
§ 4. SECOND PROVE
Once in the funky basket, cover with a towel or wrap in a plastic bag or saran wrap so the dough doesn’t dry out. Leave the dough to rest in a warm place for 1-2 hours before putting it in the fridge overnight for 8-12 hours. You could also let it rest for just 2-3 hours in the warm place and then bake it, but I prefer the two-day process—that’s the way I like it.
≠ 1. SCORE
Get a head start by putting your Dutch oven into your oven the night before baking. This way it preheats with the oven the next morning...
The next morning, queue up “Everybody Loves the Sunshine” by Roy Ayers (you should have this on vinyl, people).
Set your Disco Inferno to 500º F with the Dutch oven inside while it preheats. Once at temperature, take your banneton out of the fridge and flip your dough upside down onto a piece of baking paper and place it on your countertop. Gently remove the towel your dough was wrapped in.
Brush off any caked flour on the dough. Using your flour shaker, evenly cover the dough and rub the skin lightly with your hand.
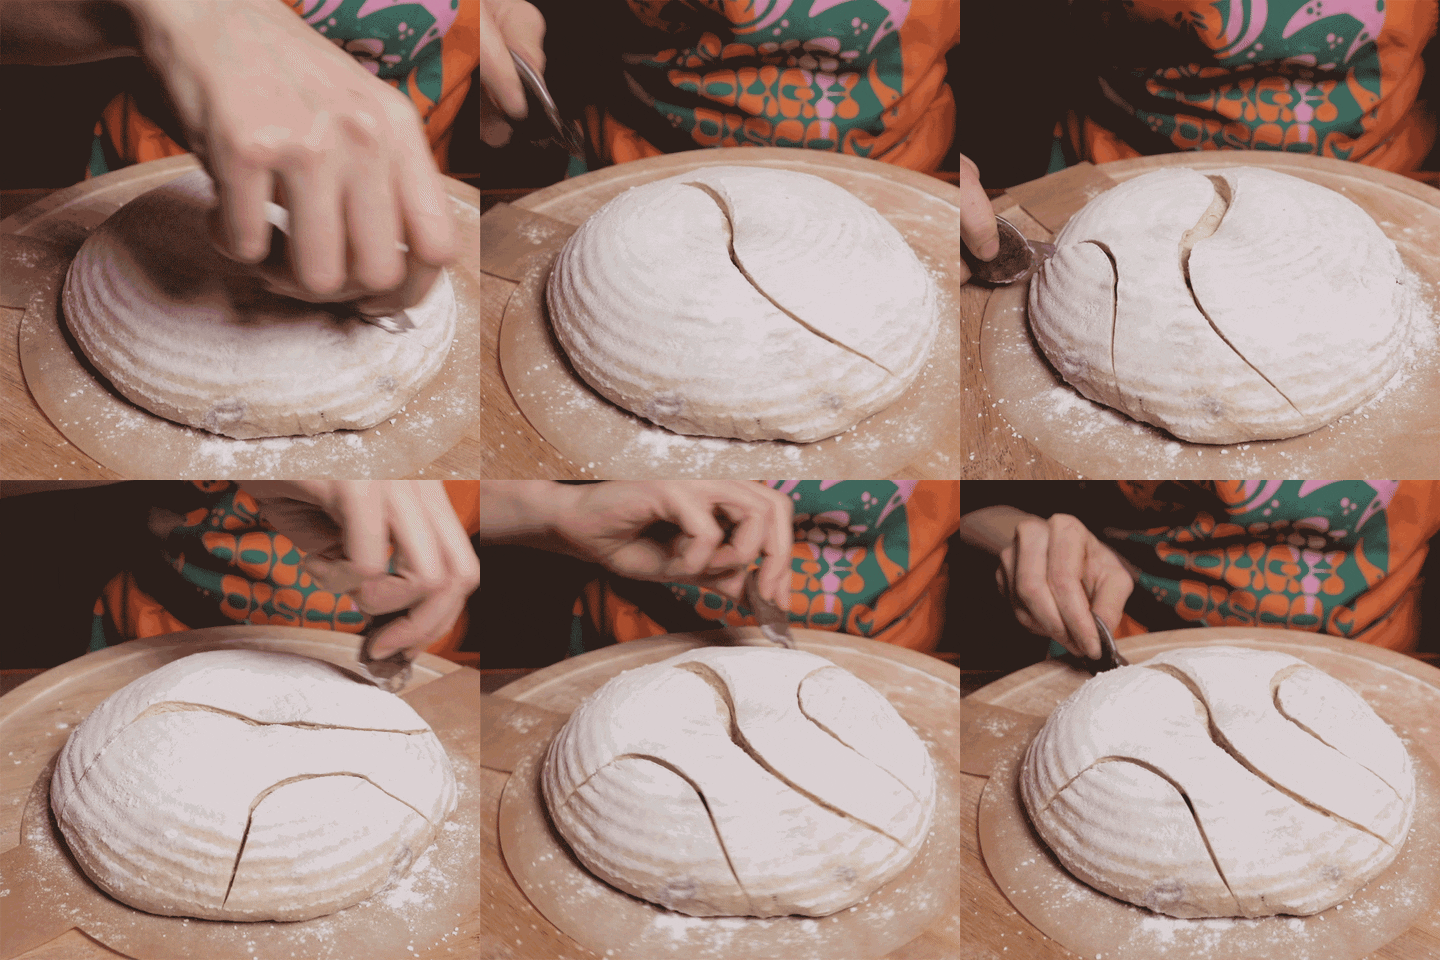
Using your Wire Monkey Lame (a razor blade will also do) make a slash across the bread. Go light and smooth, you want a clean line. This allows the bread to pop when placed in the oven. Don’t worry, you can do the flower power designs with more practice.


¢ 2. BAKE
Now, pick up the parchment and place it in the pre-heated Dutch oven. Cover the vessel and place it in the oven. It’s very important to keep the lid on this baby, it needs steam to get down!
Set a timer for 20 minutes and check to see how the bread has risen. What you’re looking for is a slight browning on the crust. Once slightly brown, take the top off the Dutch oven. Keep the Fire Burning for another 15-20 minutes depending on how dark you like the crust of your bread.
TIP: If you don’t see a slight browning on the crust, cover and cook in increments of 5 minutes until you see the browning.


